Chrome ExtensionsをVite + TypeScriptで開発する
最近、Vite + TypeScriptの構成でマニフェストV3のChrome拡張を作った。
今後もChrome拡張を作る機会は何度もありそうなので、未来の自分のために、この記事では次のことが参照できるようにする。
- Vite + TypeScriptで作る場合のファイル構成
- Chrome拡張でよくある処理をどう実現するか
以前Chrome拡張をwebpackで開発する話を書いたことがあるが、この記事は、その記事のVite版である。
Chrome Extensions を wepback + TypeScript で開発する
動作を確認した環境
- Typescript v4.6.4
- Vite v3.2.3
- @crxjs/vite-plugin v2.0.0-beta.17
CRXJS Vite Plugin
今回は、CRXJS Vite PluginというChrome拡張を作るためのViteのプラグインを使う。
このプラグインは、ReactやVueなどのフレームワークを利用したChrome拡張の開発を売りにしているが、フレームワークを利用しないChrome拡張を作る際にも使用できる。

Chrome拡張を作成する手順
Chrome拡張のアイコンをクリックすると、新規タブを開く拡張を作成してみる。
STEP1:Viteプロジェクトの作成
まずはViteのプロジェクトを作る。
$ npm init vite@3

✔ Project name: … example-chrome-extensions
✔ Select a framework: › Vanilla
✔ Select a variant: › TypeScript

Scaffolding project in /Users/chick-p/Desktop/example-chrome-extensions...

Done. Now run:

  cd example-chrome-extensions
  npm install
  npm run dev
作成したプロジェクトのディレクトリーに移動し、npm installする。
この時点でのディレクトリー構成は次のとおり。
.
├── index.html
├── node_modules
├── package-lock.json
├── package.json
├── public
│   └── vite.svg
├── src
│   ├── counter.ts
│   ├── main.ts
│   ├── style.css
│   ├── typescript.svg
│   └── vite-env.d.ts
└── tsconfig.json
STEP2:拡張に必要なパッケージのインストール
CRXJS Vite Pluginをインストールする。
@crxjs/vite-pluginは、Vite v3以上に対してはベータ対応なので、ベータ版をインストールする。
$ npm install -D @crxjs/vite-plugin@beta
Chrome拡張機能の型定義をインストールする。
$ npm install -D @types/chrome
STEP3:TypeScriptの設定の変更
tsconfig.jsonを次の内容に書き換える。
今回は、Chrome拡張の実体を「src」ディレクトリーに置くため、includeプロパティにsrcを指定する。
{
  "compilerOptions": {
    "target": "ESNext",
    "module": "ESNext",
    "lib": ["ESNext", "DOM"],
    "strict": true,
    "moduleResolution": "node",
    "esModuleInterop": true,
    "typeRoots": ["node_modules/@types"],
    "outDir": "dist", // この設定がないと、ts ファイルと同一ディレクトリに js が生成されてしまう
  },
  "include": ["src"]
}
STEP4:マニフェストファイル生成のための設定
プロジェクトのルートに、次の内容のvite.config.tsを作成する。defineManifestに渡したオブジェクトが、Chrome拡張のマニフェストファイルとして生成される。
import { crx, defineManifest } from "@crxjs/vite-plugin";
import { defineConfig } from "vite";

const manifest = defineManifest({
  manifest_version: 3,
  description:  "This is an example extension",
  name: "example",
  version: "0.1.0",
});

export default defineConfig({
  plugins: [crx({ manifest })],
});
STEP5:不要なファイルの削除
Viteプロジェクトの作成時に生成された不要なファイルを削除する。
$ rm -rf public
$ rm -rf src/*.*
$ rm -f index.html
STEP6:アイコンの設定
Chrome拡張のロゴに使用する画像ファイルを用意する。
ここでは、プロジェクトルートに作成した「icons」ディレクトリーに、画像ファイルを配置する。
.
├── icons
│   └── icon128.png # 画像ファイル
├── node_modules
アイコンファイルを読み込む設定をマニフェストに追記する。
const manifest = defineManifest({
  manifest_version: 3,
  name: "example",
  version: "0.1.0",
+  icons: {
+    128: "icons/icon128.png",
+  },
});
STEP7:拡張で実行する処理の記述
Chrome拡張のアイコンをクリックしたときに新規タブを開く処理を記述する。
$ touch src/background/index.ts
background/index.tsは、次の内容にする。
{
  chrome.action.onClicked.addListener((_tab) => {
    chrome.tabs.create({
      url: "about:blank",
    });
  });
}
Chromeのバックグラウンドに常駐させたいスクリプトは、Service Workerに登録する。
設定アイコンをクリックするには、actionプロパティの設定が必要なので、これもマニフェストに追記する。
const manifest = defineManifest({
  manifest_version: 3,
  // ...
  icons: {
    128: "icons/icon128.png",
  },
+  action: {
+    default_icon: "icons/icon128.png",
+    default_title: "example",
+  },
+  background: {
+    service_worker: "src/background/index.ts",
+  },
});
STEP8:ビルドの実行とChromeへの読み込み
この時点のディレクトリー構成は、次のとおり。
.
├── icons
│   └── icon128.png
├── node_modules
├── package-lock.json
├── package.json
├── src
│   └── background
│       └── index.ts
├── tsconfig.json
└── vite.config.ts
ビルドコマンドを実行し、プロジェクトをビルドする。
「dist」ディレクトリーに、Chromeで読み込むためのファイルが生成される。
$ npm run build

> example-chrome-extension@0.0.0 build
> tsc && vite build

vite v3.2.6 building for production...
✓ 3 modules transformed.
dist/manifest.json                      0.30 KiB
dist/service-worker-loader.js           0.04 KiB
dist/icons/icon128.png                  5.43 KiB
dist/assets/background/index.ts.32a4de68.js   0.09 KiB / gzip: 0.11 KiB
Chrome拡張機能の管理画面で、「パッケージ化されていない拡張機能を読み込む」をクリックして、「dist」ディレクトリーを指定する。
参照:手順 2: アプリや拡張機能をテストする
拡張が読み込まれ、拡張アイコンをクリックしたときに新規タブが開かれることを確認する。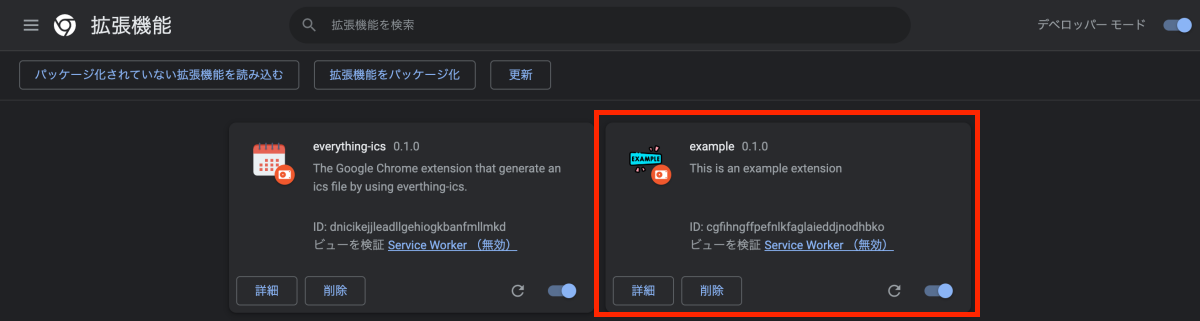
Chrome拡張でよくある処理
アクティブなタブのURLを取得する
アクティブタブのURLを取得するには、パーミッションの設定でアクティブタブを許可する。
const manifest = defineManifest({
  manifest_version: 3,
  // ...
  background: {
    service_worker: "src/background/index.ts",
  },
+  permissions: ["activeTab"],
});
たとえば、拡張のボタンを押したときに開いているページを取得する方法は、次のとおり。
chrome.action.onClicked.addListener((tab) => {
  const url = tab.url;
  console.log(url);
});
設定画面を実装する
Chrome拡張の設定画面を作るには、オプションページを実装する。
マニフェストのoptions_ui.pageに、ページのHTMLファイルのプロジェクトルートからのパスを指定すると、オプションページを指定できる。
const manifest = defineManifest({
  manifest_version: 3,
  // ...
  background: {
    service_worker: "src/background/index.ts",
  },
+  options_ui: {
+    page: "src/options/index.html",
+  },
  // ...
});
options_ui.pageに指定したHTMLファイルには、オプションページに表示させたい内容を記述する。
設定画面でJavaScriptを動かしたい場合には、<script>タグでそのファイルまでのパスを指定する。
<!DOCTYPE html>
<html>
  <head>
    <meta charset="utf-8" />
  </head>
  <body>
    <div>
      <h1>example settings</h1>
      <div class="js-description"></div>
    </div>
    <script type="module" src="/src/options/index.ts"></script>
  </body>
</html>
{
  const decriptionElement = document.querySelector(".js-description");
  if(decriptionElement) {
    decriptionElement.textContent = "This is an example extension";
  }
}
オプションページがポップアップで開かれるようになる。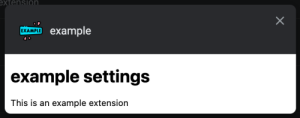
別タブで開きたい場合には、マニフェストの設定でoptions_ui.open_in_tabをtrueにする。
const manifest = defineManifest({
  manifest_version: 3,
  // ...
  options_ui: {
    page: "src/options/index.html",
+    open_in_tab: true,
  },
});
設定値を保存/取得する
Chrome拡張の設定値はchrome.storageを介して保存したり取り出したりする。
hrome.storageを利用するには、パーミッションの設定での許可が必要である。
const manifest = defineManifest({
  manifest_version: 3,
  // ...
  options_ui: {
    page: "src/options/index.html",
  },
+  permissions: ["storage"],
  // ...
});
たとえば、オプションページのスクリプトで設定値を保存し、バックグラウンド処理で取り出すには、それぞれ次のように書く。
オプションページで設定値を保存する例
{
  chrome.storage.local.set({ url: "https://example.com" }).then(() => {
    console.log("Save");
  });
}
バックグラウンド処理で設定値を取り出す例
{
  chrome.action.onClicked.addListener((_tab) => {
    chrome.storage.local.get("url").then(({ url }) => {
      if (url) {
        chrome.tabs.create({
          url,
        });
      }
    });
  });
}