Reactベースのフレームワークには、Gatsby.jsとNext.jsがあります。
このブログはGatsby.jsで実装していますが、Next.jsを勉強してみたかったので、Markdownブログを作ってみることでNext.jsを学習することにしました。
この記事では、次のようなファイル構成のブログを作ります。
contentディレクトリ以下にMarkdownファイルを配置するcontent ├── hello-world/ │ └── index.md # 記事ファイル ├── hello-nextjs/ │ └── index.md # 記事ファイル- URLを記事のファイル名とする
たとえば、上記のファイル構成の場合、https://example.com/hello-worldが記事のURLです。
Next.jsとは
Next.jsは、Reactをベースとしたフロントエンドフレームワークです。 サーバーサイドレンダリング(SSR)と静的サイトジェネレーター(SSG)をサポートしています。
動作を確認した環境
- Node.js v16.13.1
- Yarn v1.22.17
- Next,js v12.0.7
TypeScriptでNext.jsのひな形を作る
yarn create next-appで、Next.jsアプリのひな形を作ります。
$ yarn create next-app practice-nextjs-blog --typescript
$ cd practice-nextjs-blog
$ yarn dev
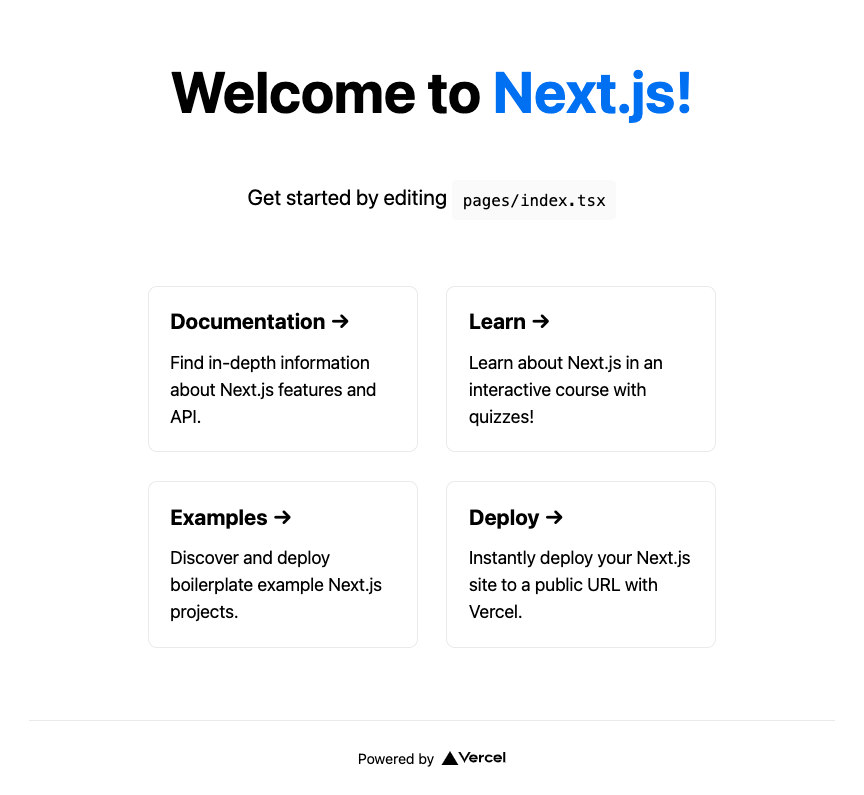
http://localhost:3000にアクセスすると、スタートページが表示されます。
この時点でのファイル構成は、次のとおりです。
$ tree
.
├── README.md
├── next-env.d.ts
├── next.config.js # Next.jsの設定ファイル
├── node_modules/
├── package.json
├── pages/ # Nextjsでルーティングされるページのコンポーネントを配置する
│   ├── _app.tsx # ルートのコンポーネント
│   ├── api/
│   │   └── hello.ts
│   └── index.tsx # トップページのコンポーネント
├── public/ # 静的ファイルを配置する
│   ├── favicon.ico
│   └── vercel.svg
├── styles/ # cssを配置する
│   ├── Home.module.css
│   └── globals.css
├── tsconfig.json
└── yarn.lock
Prettierを導入する
ESLintはひな形の時点で設定されているので、Prettierを導入します。
Ref. https://nextjs.org/docs/basic-features/eslint
$ yarn add -D prettier eslint-config-prettier
.eslintrc.jsonを開き、extendsにprettierを追加します。
{
-  "extends": "next/core-web-vitals"
+  "extends": ["next/core-web-vitals",  "prettier"]
}
srcディレクトリにJSファイルを移動する
Next.jsはsrcディレクトリに対応しているので、pagesとstylesをsrcディレクトリの下に移動します。
$ mkdir src
$ mv pages src/
$ mv styles src/
記事ファイルを作成する
contentディレクトリ以下に、記事ファイルを作成します。
$ mkdir -p content/hello-world
$ touch content/hello-world/index.md
$ touch content/hello-nextjs/index.md
それぞれindex.mdの内容を次のようにします。
---
title: "Hello World!"
date: "2021/12/27"
---

## 見出し

本文
---
title: "Hello Next.js!"
date: "2021/12/28"
---

## 見出し

本文
Markdownファイルを解析するパッケージを導入する
公式が提供しているサンプルを参考に、MarkdownファイルをHTMLに変換するためのパッケージを導入します。
$ yarn add remark remark-html gray-matter
「remark」と「remark-html」は、Markdownを解析してHTMLに変換するパッケージで、「gray-matter」はFrontmatterのYAMLを解析するパッケージです。
.mdファイルを読み込む
src/lib/api.tsに、content以下のMarkdownファイルを読み込むための関数を実装します。
import fs from "fs";
import path from "path";
import matter from "gray-matter";

type Post = {
  slug: string;
  content: string;
  title: string;
  date: string;
};

const postsDirectory = path.join(process.cwd(), "content");

/**
 * postsDirectory 以下のディレクトリ名を取得する
 */
export function getPostSlugs() {
  const allDirents = fs.readdirSync(postsDirectory, { withFileTypes: true });
  return allDirents
    .filter((dirent) => dirent.isDirectory())
    .map(({ name }) => name);
}

/**
 * 指定したフィールド名から、記事のフィールドの値を取得する
 */
export function getPostBySlug(slug: string, fields: string[] = []) {
  const fullPath = path.join(postsDirectory, slug, "index.md");
  const fileContents = fs.readFileSync(fullPath, "utf8");
  const { data, content } = matter(fileContents);

  const items: Post = {
    slug: "",
    content: "",
    title: "",
    date: "",
  };

  fields.forEach((field) => {
    if (field === "slug") {
      items[field] = slug;
    }
    if (field === "content") {
      items[field] = content;
    }
    if (field === "title" || field === "date") {
      items[field] = data[field];
    }
  });
  return items;
}

/**
 * すべての記事について、指定したフィールドの値を取得して返す
 * @param fields 取得するフィールド
 */
export function getAllPosts(fields: string[] = []) {
  const slugs = getPostSlugs();
  const posts = slugs
    .map((slug) => getPostBySlug(slug, fields))
    .sort((a, b) => (a.date > b.date ? -1 : 1));
  return posts;
}
トップページにMarkdownファイルの一覧を表示する
トップページに記事一覧を表示するコンポーネントを作ります。src/pages/index.tsxを次のように書き換えます。
import type { InferGetStaticPropsType, NextPage } from "next";
import Head from "next/head";
import styles from "../styles/Home.module.css";
import { getAllPosts } from "../lib/api";

type Props = InferGetStaticPropsType<typeof getStaticProps>;

export const getStaticProps = async () => {
  const allPosts = getAllPosts(["slug", "title", "date", "tags"]);
  return {
    props: { allPosts },
  };
};

const Home: NextPage<Props> = ({ allPosts }) => {
  return (
    <div className={styles.container}>
      <Head>
        <title>Hello world!</title>
        <meta name="description" content="Generated by create next app" />
        <link rel="icon" href="/favicon.ico" />
      </Head>

      <main className={styles.main}>
        <h1 className={styles.title}>記事一覧</h1>

        <div className={styles.grid}>
          {allPosts.map((post) => (
            <a href={post.slug} className={styles.card} key={post.slug}>
              <h2>{post.title}</h2>
              <p>{post.date}</p>
            </a>
          ))}
        </div>
      </main>
      <footer className={styles.footer}>
        <p>Powered by Next.js.</p>
      </footer>
    </div>
  );
};

export default Home;
http://localhost:3000にアクセスして、表示を確認します。
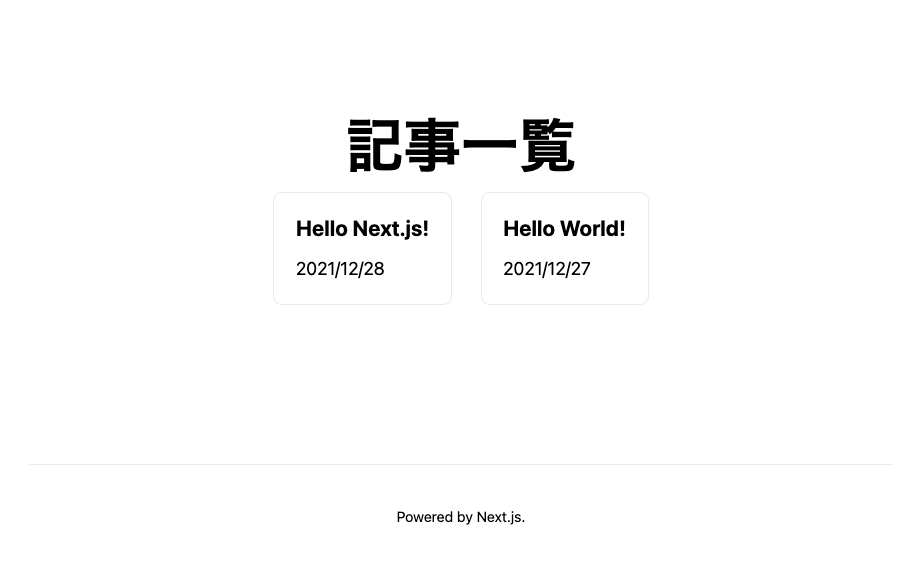
まだ個別の記事ページを作成していないので、記事をクリックしても404が表示されます。

個別の記事ページを作成する
Markdownファイルを解析して、HTMLに変換する関数を作ります。
import { remark } from "remark";
import html from "remark-html";

/**
 * Markdown を解析して HTML にして返す
 * @param markdown Markdown ファイル名
 * @returns HTML
 */
const markdownToHtml = async (markdown: string) => {
  const result = await remark().use(html).process(markdown);
  return result.toString();
};

export default markdownToHtml;
次に個別の記事ファイルを表示するコンポーネントを作ります。
次の内容で、src/pages/[slug].tsxを作ります。
import { NextPage, InferGetStaticPropsType } from "next";
import { useRouter } from "next/router";
import ErrorPage from "next/error";
import Head from "next/head";
import styles from "../styles/Home.module.css";
import { getAllPosts, getPostBySlug } from "../lib/api";
import markdownToHtml from "../lib/markdownToHtml";

type Props = InferGetStaticPropsType<typeof getStaticProps>;

/**
 * 記事のパスを取得する
 */
export const getStaticPaths = async () => {
  const posts = getAllPosts(["slug"]);
  return {
    paths: posts.map((post) => {
      return {
        params: {
          slug: post.slug,
        },
      };
    }),
    fallback: false,
  };
};

/**
 * 記事の内容を取得する
 */
export const getStaticProps = async ({ params }: any) => {
  const post = getPostBySlug(params.slug, ["slug", "title", "date", "content"]);
  // Markdown を HTML に変換する
  const content = await markdownToHtml(post.content);
  // content を詰め直して返す
  return {
    props: {
      post: {
        ...post,
        content,
      },
    },
  };
};

const Post: NextPage<Props> = ({ post }) => {
  const router = useRouter();
  if (!router.isFallback && !post?.slug) {
    return <ErrorPage statusCode={404} />;
  }
  return (
    <div className={styles.container}>
      <Head>
        <title>Hello world!</title>
        <meta name="description" content="Generated by create next app" />
        <link rel="icon" href="/favicon.ico" />
      </Head>
      <main className={styles.main}>
        <article>
          <h1 className={styles.title}>{post.title}</h1>
          <div className={styles.grid}>
            <div>
              <p>{post.date}</p>
              <div dangerouslySetInnerHTML={{ __html: post.content }} />
            </div>
          </div>
        </article>
      </main>
      <footer className={styles.footer}>
        <p>Powered by Next.js.</p>
      </footer>
    </div>
  );
};

export default Post;
ポイントは34行目と64行目です。
post.contentの内容をHTMLに変換し、dangerouslySetInnerHTMLでHTMLをinnerHTMLしてレンダリングします。
http://localhost:3000/hello-nextjs/にアクセスして、表示を確認します。
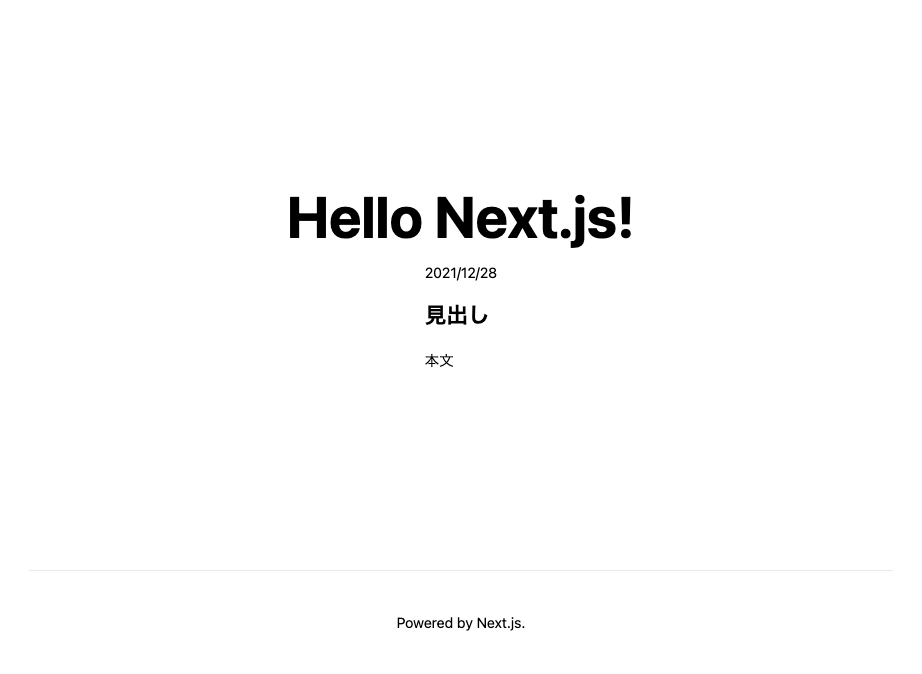 Markdownファイルから記事が生成されていることを確認できました。
所感
Next.jsは、Gatsby.jsに比べてビルドや開発サーバの立ち上げが早いなと感じました。
Gatsby.jsでは、GraphQLを使ってページの内容を取得しますが、Next.jsではJavaScriptで実装します。G
raphQLに慣れないうちは、Next.jsのほうがかんたんに感じました。
ただ、Google Analyticsの導入やコードのハイライトなど細かいところを実現しようとすると、プラグインシステムが充実しているGatsby.jsのほうが楽できるなと感じました。