SlackのSlash CommandsでInteractive Messagesを利用する
この記事では、Botがユーザーにボタン付きメッセージを送信し、ユーザーからのボタンの入力に応じてアクションするSlash Commandsの作り方を説明します。
Slash Commandsは、「/」(スラッシュ)から始まるコマンドを入力すると、特定のアクションを実行する機能です。 Slack上で、ボタンやメニューなどのインターフェースを付け足メッセージを送信できます。 また、ユーザーからのアクションに応答するには、Slack Interactive Messagesという機能を利用します。
Slash CommandsやInteractive Messagesの処理は、AWS Lambda(TypeScript)+ API Gatewayで行います。 Lambdaの設定やデプロイは手動が面倒なので、 Serverless Frameworkを利用します。
完成イメージ
Slash Comamndを入力すると、 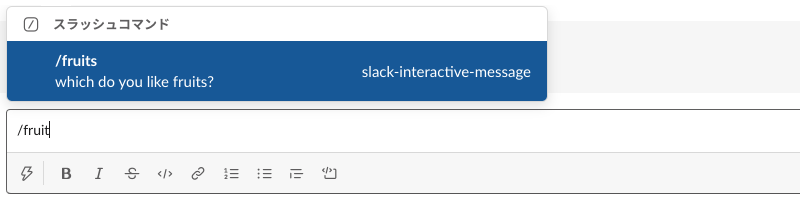
Botがボタン付きのメッセージを返します。 
ユーザーがボタンをクリックすると、 
Botのメッセージを書き換えます。
動作を確認した環境
- Node.js v12.18.1
- Serverless Framework: v1.73.1
- AWS CLI v2.0.24
Slack Appの作成
Slash Commandsを作成します。
Slack Appの作成
- https://api.slack.com/appsを開きます。
- [Create New App]ボタンをクリックします。
- モーダルが表示されるので、アプリケーション名と適用するSlackのワークスペースを選択します。
- [Create App]ボタンをクリックします。Slack Appが作成されます。
OAuthスコープの設定
- 左サイドの「Features」から「OAuth & Permissions」を選択します。
- 「Bot Token Scopes」より、[Add an OAuth Scope]ボタンをクリックします。
- 「chat:write」を選択して追加します。
- 同様に、「commands」を選択して追加します。
- ページ上部の[Install App to Workspace]ボタンをクリックして、ワークスペースにこのSlack Appをインストールします。
- アクセス権限をリクエストするページが表示されます。[許可する]ボタンをクリックします。
Signing Secretの確認
左サイドの「Features」から「Basic Information」を選択します。
「App Credentials」から「Signing Secret」の値を控えておきます。あとで、Lambdaの環境変数の設定で利用します。
プロジェクト作成
Serverless Frameworkを使って、プロジェクトを作成します。TypeScriptで開発したいので、
aws-nodejs-typescriptテンプレートを利用します。serverless create -t aws-nodejs-typescript -p slack-interactive-command Serverless: Generating boilerplate... Serverless: Generating boilerplate in "/Users/chick-p/workspace/slack-interactive-command" _______ __ | _ .-----.----.--.--.-----.----| .-----.-----.-----. | |___| -__| _| | | -__| _| | -__|__ --|__ --| |____ |_____|__| \___/|_____|__| |__|_____|_____|_____| | | | The Serverless Application Framework | | serverless.com, v1.73.1 -------' Serverless: Successfully generated boilerplate for template: "aws-nodejs-typescript"生成された
slack-interactive-commandディレクトリに移動します。cd slack-interactive-commandServerless Frameworkのデプロイ時に必要なモジュールをインストールしておきます。
yarn install
Block Kit BuilderでのUIパーツ作成
Block Kit Builderを使うと、メッセージに利用できるUIパーツを簡単にデザインできます。
左側のメニューから利用したいパーツをドラッグ&ドロップで中央のイメージ表示部分に配置すると、右側の[Payload]タブにJSONが出力されます。 また右側のJSONを編集すると、中央のイメージ表示部分に反映されます。
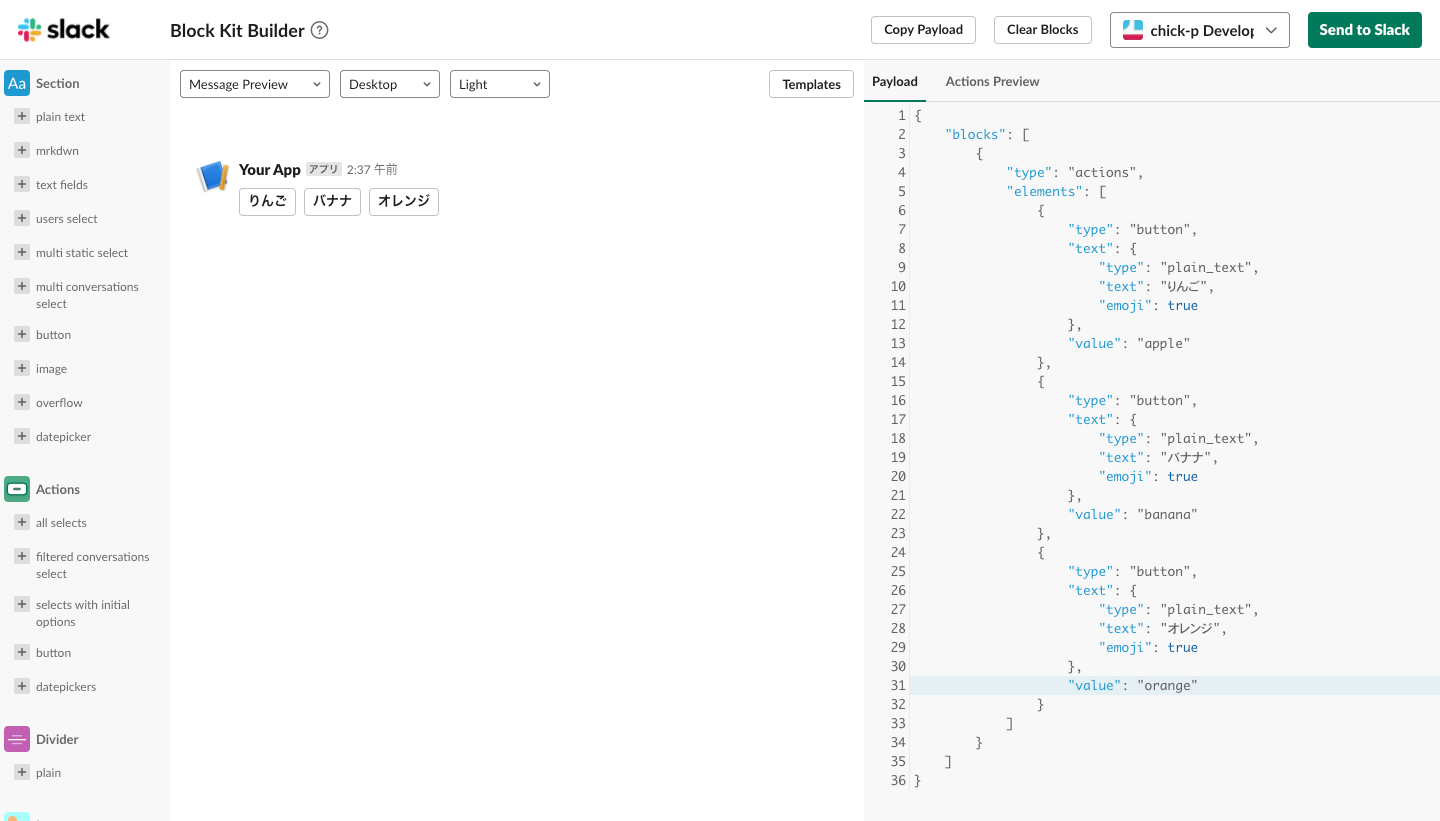
今回は、「りんご」「バナナ」「オレンジ」というラベルのボタンを配置します。またそれぞれボタンがクリックされたときの値をvalueに設定しておきます。
メッセージを作成したら、[Payload]タブのJSONを控えておきます。
Slash Commandsが実行されたときに呼び出される関数[object Object]の実装
Slash Commandsが実行されたときに呼び出される関数を作成します。
handler.tsを開いて、次のコードに書き換えます。blocks変数の値は、「Block Kit BuilderでのUIパーツ作成」で作成したJSONのblocksの値を指定します。import { APIGatewayProxyEvent, APIGatewayEventRequestContext, APIGatewayProxyResult, } from "aws-lambda"; import "source-map-support/register"; const buildErrorResponse = () => { return { statusCode: 200, body: "Sorry, that didn't work. Please try again.", }; }; export const command = async ( event: APIGatewayProxyEvent, context_: APIGatewayEventRequestContext ): Promise<APIGatewayProxyResult> => { // リクエストが作成した App から送信されたものかを判定する // 詳細は後述 if (!isVerifiedRequest(event)) { return buildErrorResponse(); } // 「Block Kit Builder での UI パーツ作成」で作成した JSON の `blocks` の値 const blocks = [ { type: "actions", elements: [ { type: "button", text: { type: "plain_text", text: "りんご", emoji: true, }, value: "apple", }, { type: "button", text: { type: "plain_text", text: "バナナ", emoji: true, }, value: "banana", }, { type: "button", text: { type: "plain_text", text: "オレンジ", emoji: true, }, value: "orange", }, ], }, ]; // メッセージの本文に Block Kit Builder で作った blocks を返す return { statusCode: 200, body: JSON.stringify({ response_type: "ephemeral", blocks, }), }; };response_typeにephemeralを指定すると、コマンドを実行したユーザーにのみ応答メッセージが表示されます。
Slackリクエストの検証
Slackから送られてくるリクエストが正しいかを検証するisVerifiedRequest()を実装します。
Slackから送られてくるリクエストは、次の2つを満たすとき正しいリクエストとして判定することを推奨しています。
- リクエストヘッダー
X-Slack-Request-Timestampの値は5分以内か - リクエストヘッダー
X-Slack-Signatureが、リクエストボディの値とリクエストヘッダーのタイムスタンプの値をSigning Secretをキーにしてハッシュ化した値と正しいか
参考: https://api.slack.com/authentication/verifying-requests-from-slack
cryptoとtsscmpを追加します。yarn add crypto tsscmp以下を
handler.tsに追記します。// ...略 import "source-map-support/register"; // 以下を追記 import * as crypto from "crypto"; import timingSafeCompare from "tsscmp"; // ...略 // 以下を追記 const isVerifiedRequest = (event): boolean => { const signature = event.headers["X-Slack-Signature"]; const timestamp = event.headers["X-Slack-Request-Timestamp"]; // timestamp does not differ from local time by more than five minutes if (Math.floor(new Date().getTime() / 1000) - timestamp > 60 * 5) { return false; } // compare to equal the signatures const hmac = crypto.createHmac("sha256", process.env.SLACK_SIGNING_SECRET); const [version, hash] = signature.split("="); hmac.update(`${version}:${timestamp}:${event.body}`); return timingSafeCompare(hmac.digest("hex"), hash); }; // ...略
ユーザーがボタンをクリックしたときに呼び出される関数[object Object]の実装
ユーザーがボタンをクリックしたときに呼び出される関数answerを作成します。
axiosとqsを追加します。yarn add qs axiosaxiosは、ユーザーからのアクションの応答を送信するために利用します。qsは、Slackから送られてくるレスポンスをparseするために利用します。
以下を
handler.tsに追記します。// ...略 import timingSafeCompare from "tsscmp"; // 以下を追記 import qs from "qs"; import axios from "axios"; // ... /// 略 // ... // 以下を追記 export const answer = async ( event: APIGatewayProxyEvent, context_: APIGatewayEventRequestContext ): Promise<APIGatewayProxyResult> => { // リクエストが作成した App から送信されたものかを判定する if (!isVerifiedRequest(event)) { return buildErrorResponse(); } const body = qs.parse(event.body); const payload = JSON.parse(body["payload"] as string); // ボタンクリックのアクションのときだけ返答する if (payload.type === "block_actions") { await axios.post( payload.response_url, JSON.stringify({ text: `${payload.actions[0].value} is selected!`, }), { headers: { "Content-Type": "application/json; charset=UTF-8", }, } ); } return { statusCode: 200, body: JSON.stringify({ response_type: "ephemeral", }), }; };payload.response_urlで渡されるURLにリクエストを送ると、元のメッセージ(ボタンを表示していたメッセージ)を書き換えできます。response_urlのURLは、30分以内に5回まで有効です。- 期限が切れた後にメッセージを書き換えたい場合は、Web APIの
chat.updateを使って書き換えます。
serverless.ymlの修正
AWSへデプロイするため、serverless.ymlを修正します。
リージョンの設定
この記事では、東京リージョンを指定します。
provider:
  name: aws
  runtime: nodejs12.x
  apiGateway:
    minimumCompressionSize: 1024 # Enable gzip compression for responses > 1 KB
  environment:
    AWS_NODEJS_CONNECTION_REUSE_ENABLED: 1
  region: ap-northeast-1 # 追記
作成した関数を定義
作成した関数commandとanswerをそれぞれ定義します。 SlackからはPOSTリクエストが送られてくるので、methodはpostにします。
functions:
  command:
    handler: handler.command
    events:
      - http:
          method: post
          path: command
  answer:
    handler: handler.answer
    events:
      - http:
          method: post
          path: answer
環境変数を定義
環境変数(SLACK_SIGNING_SECRET)は、デプロイするコマンドで与えるようにします。
provider:
  name: aws
  runtime: nodejs12.x
  apiGateway:
    minimumCompressionSize: 1024 # Enable gzip compression for responses > 1 KB
  environment:
    AWS_NODEJS_CONNECTION_REUSE_ENABLED: 1
    SLACK_SIGNING_SECRET: ${env:SLACK_SIGNING_SECRET} # 追記
  region: ap-northeast-1
AWSへのデプロイ
AWSにデプロイします。secretの部分は、「Slack Appの作成」の「Signing Secretの確認」で確認したSigning Secretに置き換えてください。
SLACK_SIGNING_SECRET=secret serverless deploy
ローカルでtsファイルがjsファイルにトランスパイルされ、AWSにデプロイされます。
デプロイが完了すると、LambdaのエンドポイントURLが表示されるので、控えておきます。
...略...
endpoints:
  POST - https://example.execute-api.ap-northeast-1.amazonaws.com/dev/command
  POST - https://example.execute-api.ap-northeast-1.amazonaws.com/dev/answer
...略...
Slack Appの設定
Slash Commandsの追加
作成したSlackアプリケーションを開きます。
左サイドの「Features」から「Slash Commands」を選択します。
[Create New Command]ボタンをクリックします。
次の内容を入力します。
項目 値 Command コマンド名を入力します。この記事では「/fruits」にしています。 Request URL Lambda のエンドポイント URL(command のほう)を入力します。 Short Description コマンドの説明文を入力します。 [Save]ボタンをクリックします。
Interavtive Messagesの設定
- 左サイドの「Features」から「Interactivity & Shortcuts」を選択します。
- 「Interactivity」を「On」にします。
- 「Request URL」に、LambdaのエンドポイントURL answerのほう)を入力します。
- [Save Changes]ボタンをクリックします。
動作確認
- Slackのワークスペースを開きます。
- 任意のチャンネルを開きます。
- メッセージ欄に「/fruits」(「Slash Commandsの追加」で追加したコマンド)を入力し、送信します。
- ボタン付きのメッセージが表示されます。
- いずれかのボタンをクリックします。
- ボタン付きのメッセージの内容が書き換わります。
以上で動作確認は終わりです。